My Ski Servicing Equipment

Base service ski

Recently I released an article describing what I believe to be Essential Ski and Snowboard Servicing Equipment. Below is a quick run down of my ski servicing equipment.

My Servicing Equipment

So what do I use? Like most toolkits, my ski servicing equipment was acquired on a budget. It consists of a mixture of brands. I’m happy with what I have, but I would also change some of the tools if I were to buy everything again. You may notice that the list does not include every tool I recommend in my Essential Ski and Snowboard Servicing Equipment article. This is because I usually borrow the items I don’t own (I recommend making friends with some ex racers!).

Clamps: I have the Holmenkol EasyPro clamps, I got them cheap on eBay 2nd hand. They are only two parts so are relatively light for traveling. I that you can put your skis at 45°, it makes any edge servicing really easy. I do not like them however for scraping and brushing I find they do not hold my skis well enough.
Link: https://www.holmenkol-shop.eu/rain-sport-de1/ski-snowboard-vices1/skivices-alpine/holmenkol-ski-vice-superpro-easy

Sidewall remover: I don’t have one, I borrowed a friends when I needed it.

Edge Stone: A friend gave me an old one. Something like this from TOKO will be perfect.  https://www.toko.ch/en/wax-tools/tools/product/show/universal-edge-grinder/

Edge Tune and File: I bought these together while working in resort, I got the Holmenkol edge tuner “Semi Edger”. On the whole it works ok, I would recommend changing the file to a longer WC style edge file. The good part of this tuner is that it can take longer files and diamond files easily (up to a width of 5mm). It can be adjusted from 85° to 90°, so you only need this one edge tuner if you are travelling light.

Link: https://www.holmenkol-shop.eu/rain-sport-de1/edge-tuner/side-edge1/holmenkol-edge-tuner-semi-edger

Rubber Bands: I use wrist bands from a bar give-away, something like these charity ones..

(image found on google, I hope no-one complains)

Diamond File: I have a Holmenkol World Cup – Medium (600 grit), I got this one because it was in an end of season sale (-50%!). I’m very happy with it, but I’m sure other brands are good too.

Link: https://www.holmenkol-shop.eu/rain-sport-de1/files-diamond-files1/diamond-finishing-files/holmenkol-diamond-file-world-cup-medium-k-600

Brushes: I have two TOKO brushes, the cheaper smaller ones without straps. I have the nylon one and the horsehair. I use the nylon one most of the time (for cleaning and finishing). The horsehair one was cheap and I only ever use it to finish my race ski (not really necessary but it makes me feel warm inside).
https://www.toko.ch/en/wax-tools/tools/product/show/base-brush-nylon

Waxing Iron: I got mine pretty cheap from Decathlon. Its a Vola Wax Mousse.
I’m really happy with how it works. The only negative is that the analog temperature dial makes it hard to heat the iron to an exact temperature. If you are using racing wax which requires a specific temperature, you might be better with an iron with digital temperature adjuster.


Link: https://www.vola.fr/fr/sport/accessoires/fershousse/fers

Wax: For everyday use I use whatever non-fluoro all in one or training wax I can find. If you can buy in bulk its much cheaper. For my Austrian Landes exam (race speed test) I would have used a performance wax too, but I ended up renting a ski, and thats another story.

The End.

That concludes the round up on my ski servicing equipment, I didn’t bother telling you about my scraper, I thought it a bit unnecessary. Don’t forget to read my article on what I believe to be Essential Ski and Snowboard Servicing Equipment.

Essential Ski and Snowboard Servicing Equipment

base grind

Ski and snowboard servicing can add a lot of additional cost to your winter season. Often you can find a good price for a service with your local service centre. However, another option is to learn how to service your own skis or snowboard. Below is my list of some of the most essential ski and snowboard servicing equipment, and a quick description of what they are for.

Servicing tools are not cheap, however they are a good investment, most of these tools will last you for years. Also, servicing your own edges takes off much less metal than a machine service. This means your skis and snowboards can be serviced many times more.

*I will also suggest a DIY alternative where possible. This could save you money, or just lighten your load when travelling. Its worth checking out some servicing kits, which include a few of the main tools you need.  Kits are not often the best quality tools, but they can be a good cheap way to start building up your toolkit.
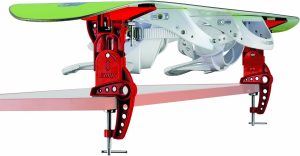
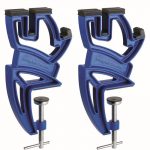
Clamps

Clamps are used to hold your skis or snowboards in place while you service. They really make you service easier and some kind of clamp is a must.

*DIY option: Its quite easy to create your own workstation. The most basic is to fix two pieces of wood to a bench (just wider than your bindings). You can then sit your skis or board across them ready to service.
If you do a quick web search, you will find lots of great ideas for making your own workstation. Tip try searching for “DIY ski servicing clamps” for ideas.

So although buying clamps is not essential, having some kind of workstation definitely is essential ski and snowboard servicing equipment.

Sidewall remover

To edge or ‘tune’ your skis / board, you will need to take a bit of the sidewall away. You might be able to tune your edges once or twice without, but very soon the sidewall will get in the way of the edge.

Edge stone

This stone is used to remove the rough burrs and protruding metal from your edges that are left behind from hitting rocks etc.. this is not essential, if you are able to avoid hitting rocks 😉

Side Angle / Edge Tuner

This is where you need to choose between a Side Angle tool which has a fixed angle, or a an Edge Tuner which can be adjusted to suit your needs. A Side Angle is usually a much more stiff and stable tool that makes it easy to accurately edge your equipment. However it is fixed at only one angle, so if you use a different angle for other equipment, you will need multiple Side Angle tools. The other option is an Edge Tuner, these are usually adjustable or can be flipped over for tuning different angles. The downside of these is that they are usually plastic, so they are less durable and have a small amount of play that can make it harder to achieve that perfect edge.
Adjustable Edge Tuner (above)


Fixed Edge Tuner (note you will also need a clamp to fix the file to the edge tuner.
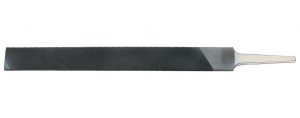
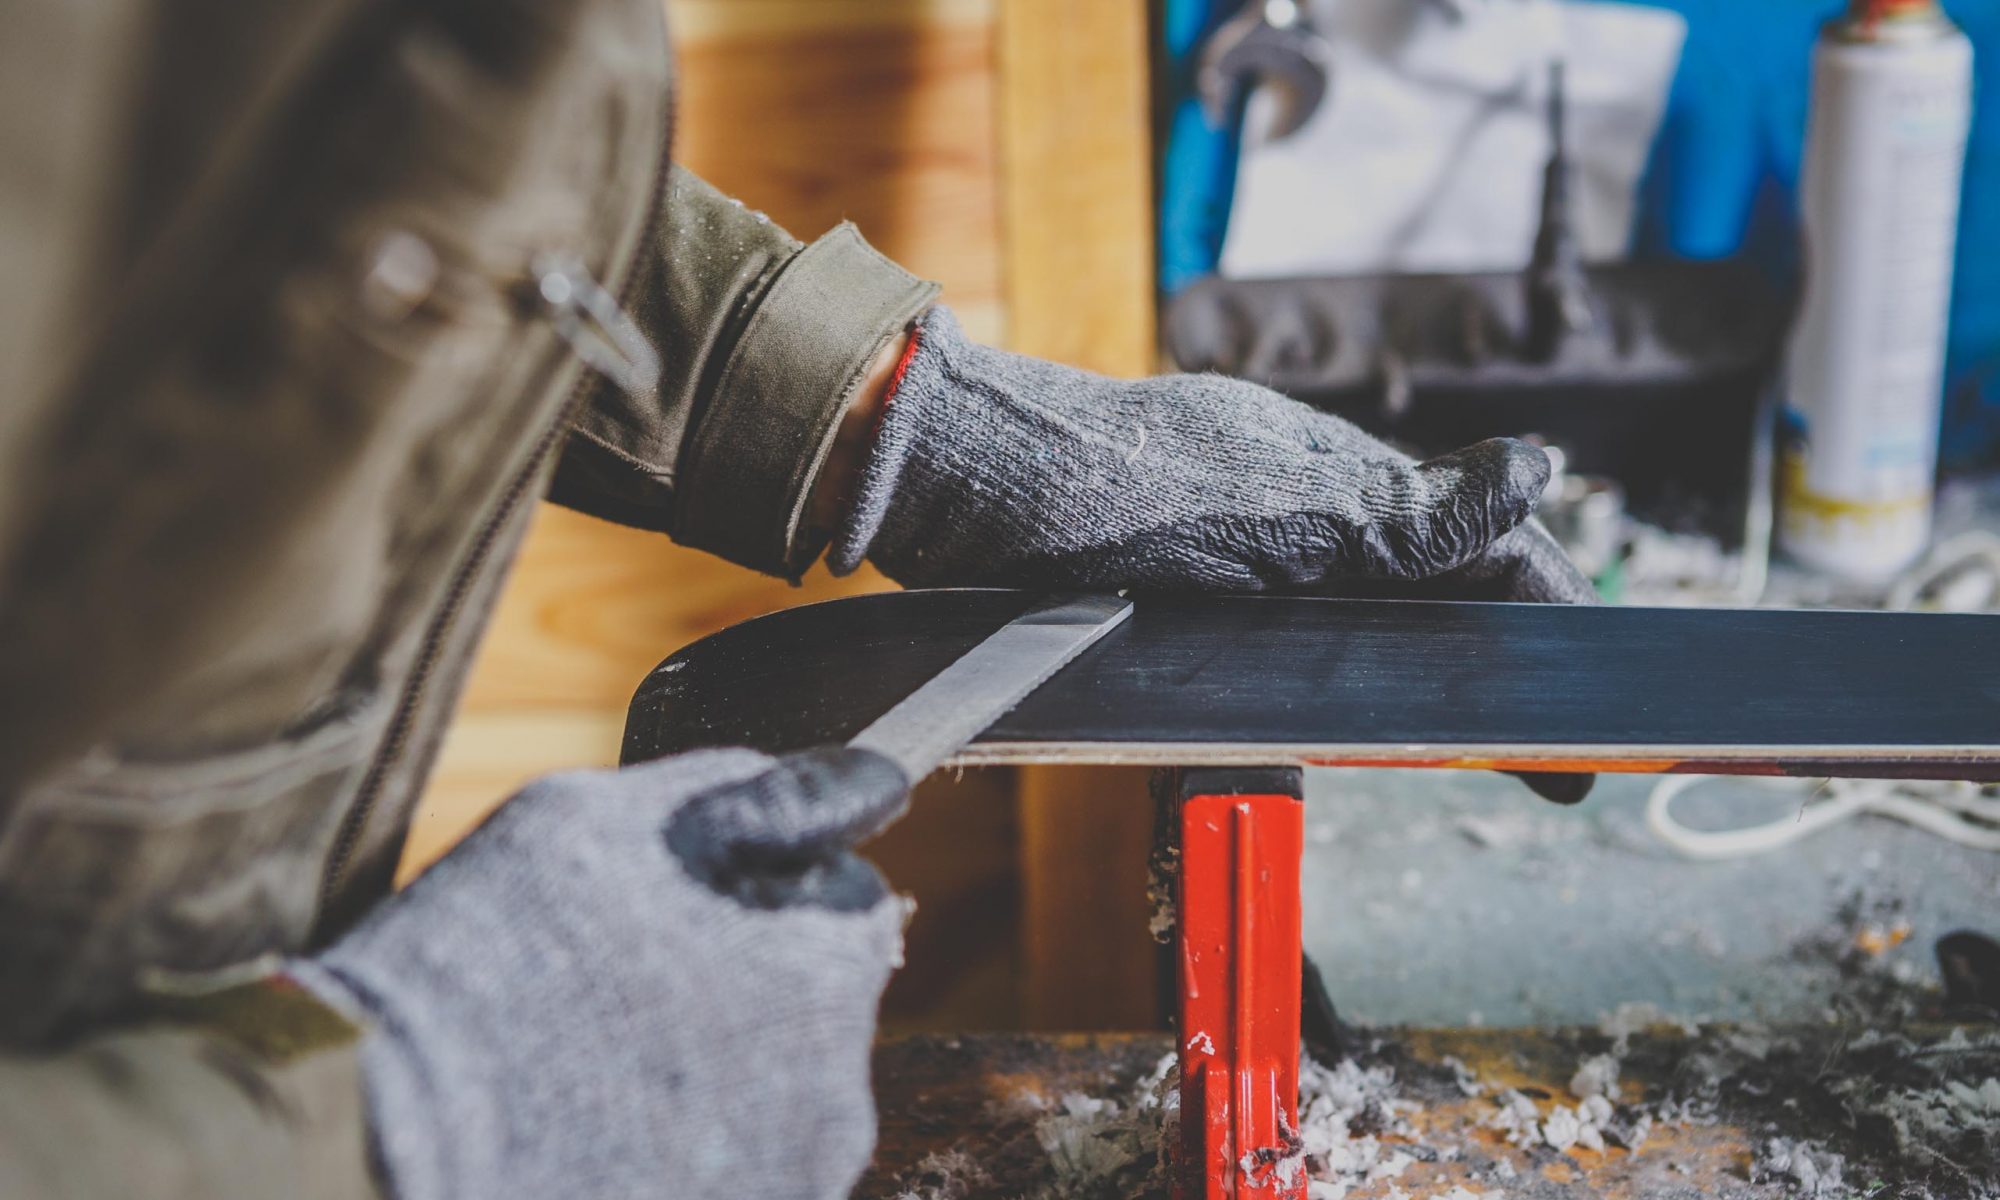
Edge file

This is a must for my essential ski and snowboard servicing equipment list. Often Edge Tuners or servicing kits will come with a suitable file. However, I would recommend you spending a bit more money on a better file, most are branded as WC or World Cup edge files.

Rubber bands (ski only)

Use these to hold ski brakes retracted out of the way.

* If you can’t get your hands on any bands, the DIY option is string string or ski straps etc. I use rubber wrist bands that a bar gave me as part of a promotion.
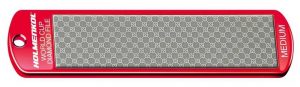
Diamond file

If you take a microscope to your edges after you have tuned them with a file, you will see that they are still not smooth, a diamond file will polish the edge and smooth out that rough side, in turn making your edge sharper. Without this, your edges will blunt much faster. Diamond files are available with a grit level of around 100 to 1600.
100 is quite rough and could be used in place of your edge file. I would recommend a 600 grit for finishing your skis. If you are racing you could finish with a smooth 1600 grit. This is a bit overkill for everyday skiing though.
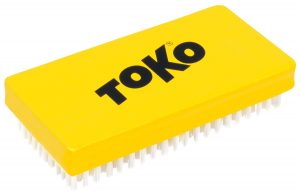
Brushes

There are a few different brushes for preparing your base and creating a race finish. It would ideal be to have a whole array of brushes to suit every situation. We don’t all have this option though so you can scale down your brush collection to whichever suits you best. I would recommend using a mixed soft copper brush for cleaning off dirty wax and preparing your base. After waxing and scraping, you will need to brush the skis again to give a good ‘finish’. For this you could use a nylon brush or a much finer horsehair brush.

*A DIY option is to use a scouring pad or the rough part on the back of your kitchen sponge, it will give the base a half decent structure (click here for details on base structure) and also performs well enough at finishing. See wax for more details on finishing

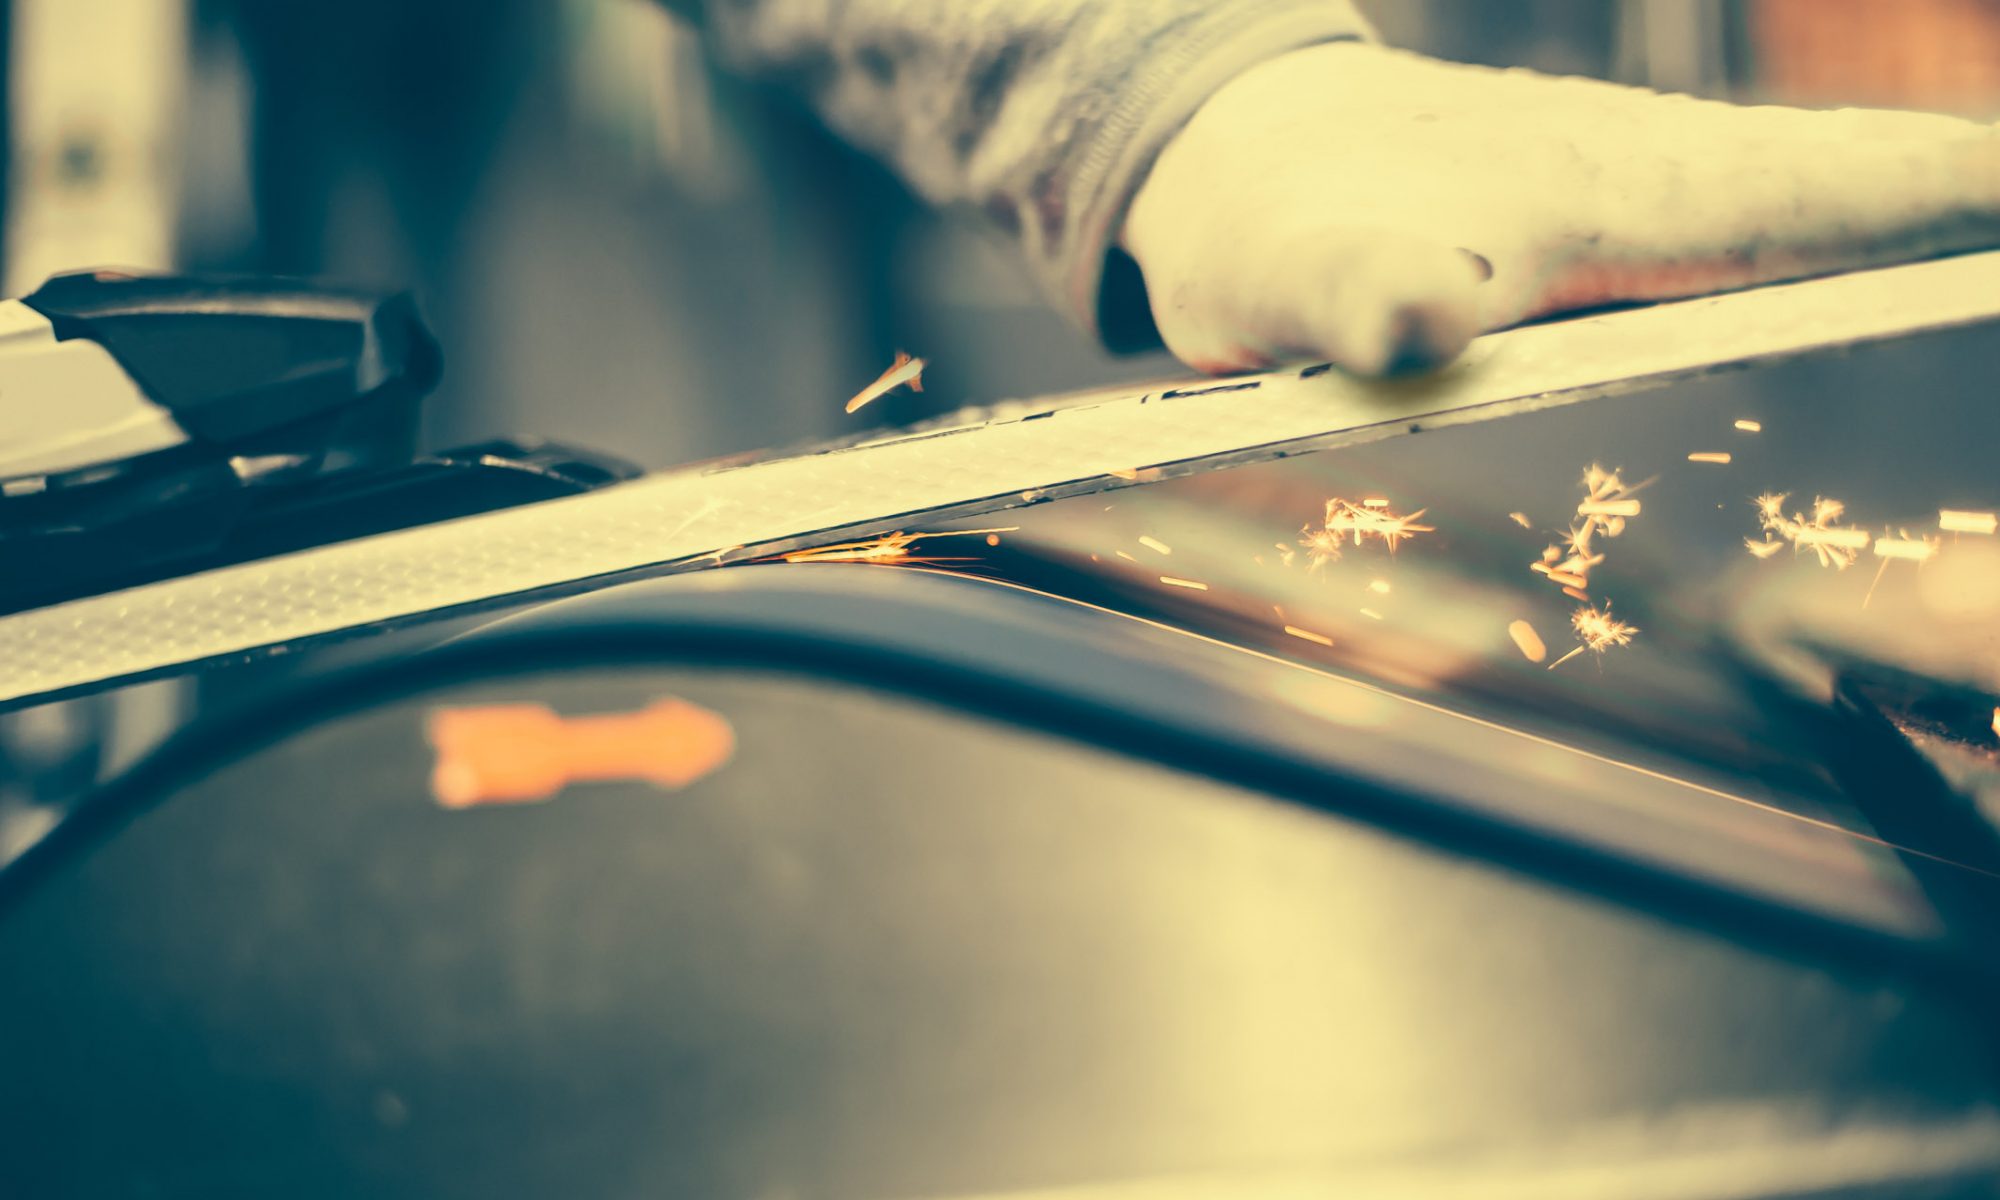
Base Repair Candle (P-TEX)

Sadly it is inevitable that you will hit a rock and take chunk out of the bottom of your skis or snowboard. If you do, you will need a P-TEX candle, use this to drip and fill your nasty gash.
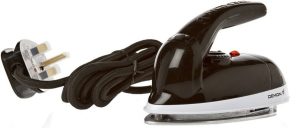
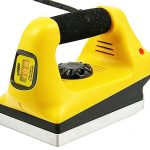
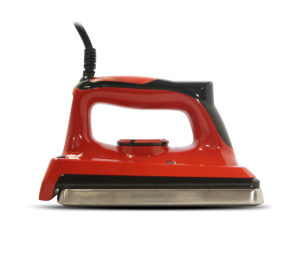
Waxing Iron

Waxing Irons are used for melting the wax and spreading it on the base of your ski / snowboard. You can find small travel waxing irons if you need to travel light. The advantage of a larger one however is a thicker iron plate which will heat more evenly. Please buy an iron designed for waxing, don’t use a clothes iron, they do not provide heat evenly and its very likely you will destroy your equipment by burning your base. Equally, travel irons can deliver heat less evenly, so be careful not to wax for too long.

Wax

Wax is essential. When you ski on snow you create heat, the very surface of the snow becomes a film of water which your ski would stick to without wax. Much like a car tyre, your ski / board needs a tread to allow the water to be dispersed. This is why you should brush after waxing, and take care of your bases. If you find your base gets dry very quickly after waxing, see base structure (coming soon).

There are many many different waxes and you could spend a small fortune on racing wax, these usually contain fluorocarbon which dispels water, can be very effective for skiing but they are expensive, the fumes are pretty hazardous to your health if you don’t ventilate, plus they are potentially harmful to the environment. Unless you are actually racing I would say fluoro waxes are unnecessary. Flouro waxes can also clog up your base structure, and dry out your bases if you don’t regularly clean them properly using fluoro  solvents.

You can also go into temperature specific waxes for all the varieties of winter, however for everyday skiing and teaching, I would recommend a universal wax, perhaps advertised as a training wax, they tend to have a broad temperature range. Universal or training waxes are quite durable, so they have a good lifespan before they need applying again.

Scraper

After waxing you need to remove the excess wax. for this you need a plastic scraper. If you buy a servicing toolkit, this will nearly always be included.

You may have seen some metal scrapers, On the whole I would not recommend them. Metal scrapers can be too harsh and also damage the structure of your base.

Scrapers are also used to shave excess P-TEX giving a flat base again. For this I would use a metal one, until it is nearly flat, then swap to plastic to finish.

The End.

Thanks for reading, If you have your own preferred tools, please feel free to comment below. If you’re interested in what tools I use, head on over to my other article and read about My Ski Servicing Equipment.

Buying Skis for Anwärter

skis_in_snow

Buying ski equipment can be a very expensive task. I hope to guide you on buying not only the right skis for anwärter exams (Austrian level 1, more or less equivalent to international level 2), but also skis that will be suitable for you throughout your first season / seasons.

Buying the right Skis for Anwärter

Normally buying skis is quite a personal thing, but for ski instructor exams and teaching you will need the right tool for the job. The Anwärter is mostly focussed on turning you into a beginner instructor, you will re-learn how to snowplough and ‘plough-steer’. The Anwärter also has some performance ski testing of short and long turns.
Although it is possible to pass your exams and work using your park skis, none of your fellow students, or your own future students will appreciate the spray your twin tips are flicking up as they follow close behind you.

A more appropriate choice would be a good race carver. Usually a turn radius of around 16-20m depending on ski length. They are aggressive enough for the performance testing but still manageable enough for the snowplough.
My personal favourite for price vs performance is the Rosignol Hero Long Turn   TI. HERO-ELITE-LT-Ti
This ski is suitable for Anwärter level. It is also stiff enough to take off piste and aggressive enough for your Landes 1 and 2 exams.

Some other alternative race carvers would be:

  • Head WC Rebels I.Spead
  • Fischer RC4 Worldcup RC
  • Atomic Redster G9
  • Völkl Race Tiger GS
  • Salamon X-Race SW
  • Nordica Dobermann GSR RB EVO
  • Blizzard WRC Racing WC Piston

Size

Length really does depend on your ability. At Anwärter level you should be buying a ski length that reaches your eye level from ground or higher. If you can handle higher then it will pay off for your Landes exams. It is important to buy a ski you can handle though so don’t ever reach.

Where to buy

Although you will find some cheap prices online, if you have not tried these skis before it is quite a risk to buy online. If you are not able to test any before you begin your anwärter, do a ski test while you train. Often you will get a small discount if you are a ski instructor or training to be one. If you are on a low budget then ring ahead to a ski shop, you might be able to rent some ski’s and even purchase the rental skis at a good price.

If you are doing a pre-course to prepare you for your exams it is worth checking with them before buying. They may be able to recommend equipment for you and sometimes have a deal with a local ski shop giving you good discounts.


If you have any queries or anything to add then please do so below.
Happy buying to you and good luck with your course!

Hestra Army Leather GORE-TEX Three Finger Gloves Review

Hestra GORE-TEX Range

A couple of years ago I was searching for a ski glove that would be warm and durable enough to survive the daily wear and tear of ski instructing. I stumbled across a recommendation for Hestra Army Leather gloves and after some further research I bought the Hestra Army Leather GORE-TEX Three Finger Gloves. At the time they cost me £125 which I considered very expensive, I was really hoping they would live up to the hype and survive at least one full winter.
Hestra Army Leather GORE-TEX three finger glove

The Test

When they arrived I was really impressed with the quality and comfort. My winter started with training on the Kitzsteinhorn glacier in Austria. We experienced very warm weather of around 15℃, followed by the extreme cold of -32℃ within the first few weeks and i wore these gloves throughout.

The Hestra Army Leather GORE-TEX gloves are very warm so although my hands were warm and even sweaty, the gloves remained odourless unlike many of my friends with cheap gloves.

During the cold times my hands were sometimes cold but again I was coping a lot better than those with cheap gloves. Often it would be my index finger that felt the cold, this is the downside of the three finger compared with the mitten. In these instances I would just move my index finger into the same compartment until it warmed up again.

The Hestra Army Leather GORE-TEX really does keep your hands dry. Being an instructor I work through any weather including rainy days and these really do perform. When the gloves have been cared for and waxed as per manufacturers instructions they will keep you dry all day long.
I only got wet hands when I allowed the leather to dry out (no wax for a couple of months), or when rain water was running in off my sleeve.

Gloves with a wrist strap are a must for me, I need quick access to my phone, tickets etc. and these make life much easier. Also included is a carabiner, this keeps them safe whilst i’m not wearing them. Just be careful not to drop snow in them, if you have any snow in the cuffs make sure you remove them with your hand upwards so that that snow doesn’t fall in.

Durability

Hestra Army Leather GORE-TEX gloves used
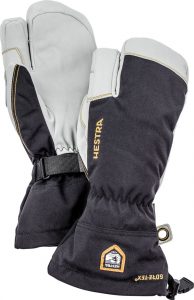
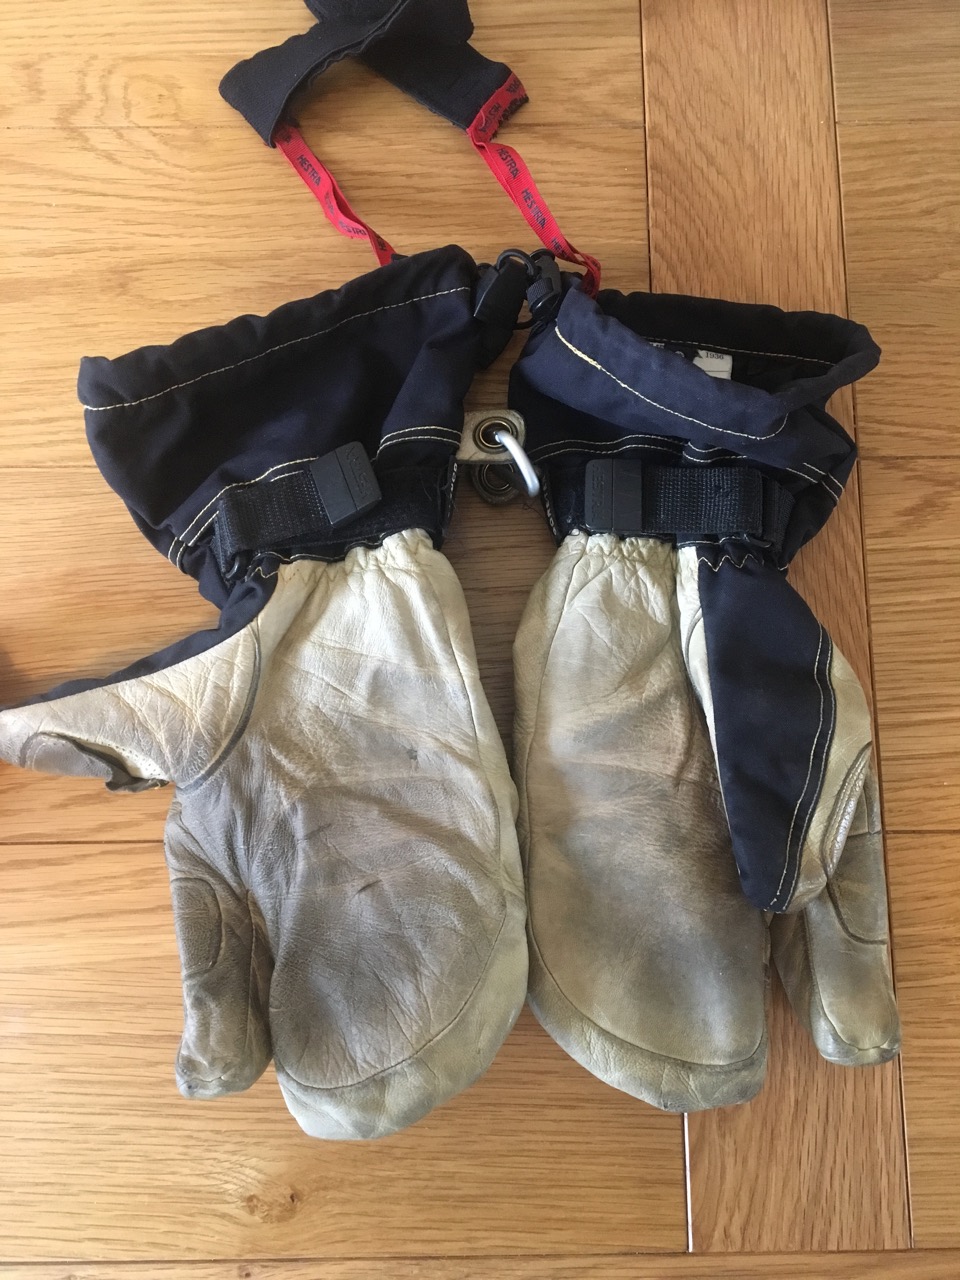
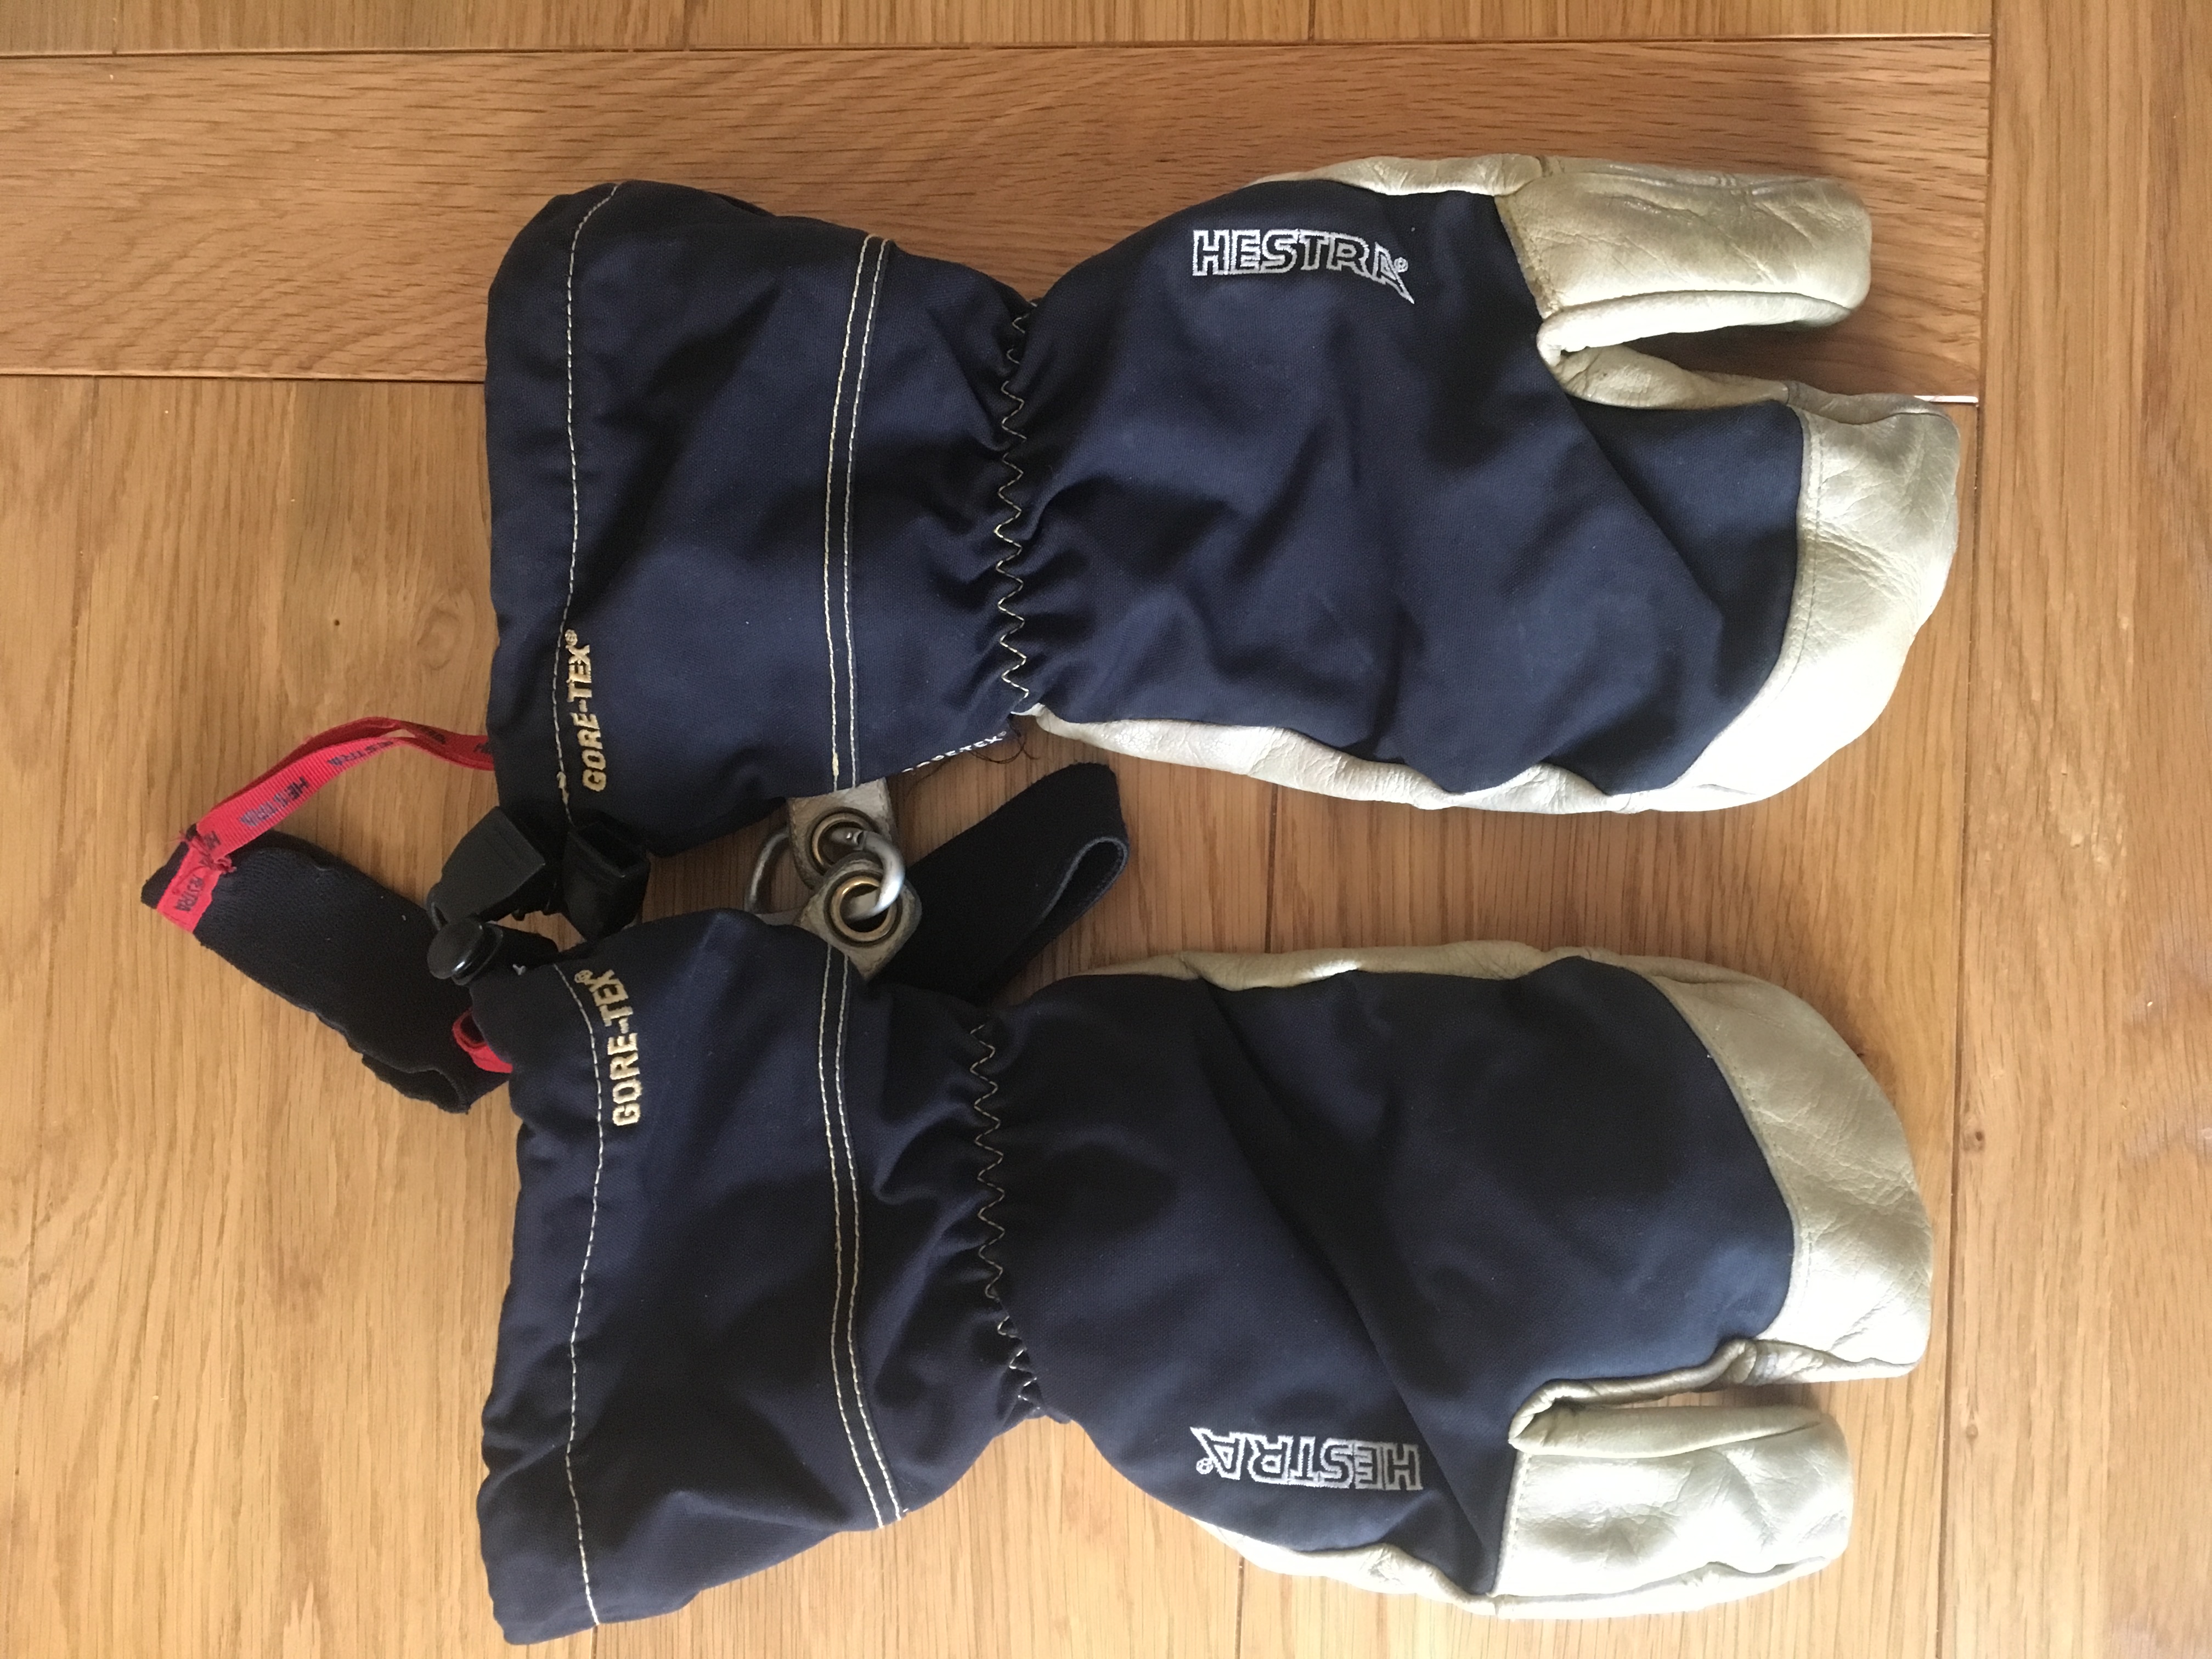
The durability of the Hestra Army Leather GORE-TEX gloves have really impressed, I have now used them for two long seasons (12 months of total use). There are a few cuts from careless ski carrying but they have not cut all the way through. The only other damage is the  leather thumb patch stitching on my favoured ski carrying hand.

The inside is nowhere near as cosy and soft as they originally were but the functionality has not deteriorated. If this will bother you then perhaps look at the none GORE-TEX versions as the liners are replaceable.
Used Hestra Army Leather GORE-TEX

You can see that the white has yellowed which is normal, the dark stains are from the daily set up of training areas and barriers.

Summary

To summarise, I highly recommend these gloves. If you are working or just holidaying in the snowsports world, these gloves will endure and are well worth the extra money.

Check out their full range on the website https://hestragloves.com/sport/en/

Review by Ben Cordingley